Homelab 2.0

I have been running my NAS/homelab for around 4 years. Initially, it was just one machine in a beautiful fractal case, with a few hard drives. Then I bought a Dell Optiplex 3050 Micro because I needed extra CPU, and I also wanted to play with a multi-nodes Kubernetes cluster. I then got a Mac mini for iOS development. At that point, there were cables everywhere under my desk and it looked messy. I decided to do something about it. And I embarked on a journey to set up a server rack under my desk…
Choosing the hardware
I was largely inspired by this article (it’s a great read by the way), but I had a few constraints:
- I don’t have a lot of space under my desk, so I needed something small
- I didn’t want all the bells and whistles (I don’t need a battery backup or a managed switch for example)
- Related to the previous point, I wanted to keep the cost low
- I needed something silent, because I work from home and the rack is literally at my feet all day long (oh boy did I mess this one up…more on that later)
TL;DR
- Rack: 12U Open Frame Network Rack: £90
- Network switch: YuanLey 9 Port 2.5G PoE Switch Unmanaged: £76
- Network patch panel: 24 Port 1U Rack Mountable CAT6 Patch Panel: £25
- Power strip: 7 Way power strip: £27
- New NAS case: XPC-2400 2u 400mm Micro ATX Rackmount Chassis: £82
- Dell PowerEdge R230 1U Rack Server: £300
NOTE: I’m only listing new components:
- I recycled everything I had in my custom NAS
- I already had a Dell Optiplex 3050 Micro
- I already had a Mac mini
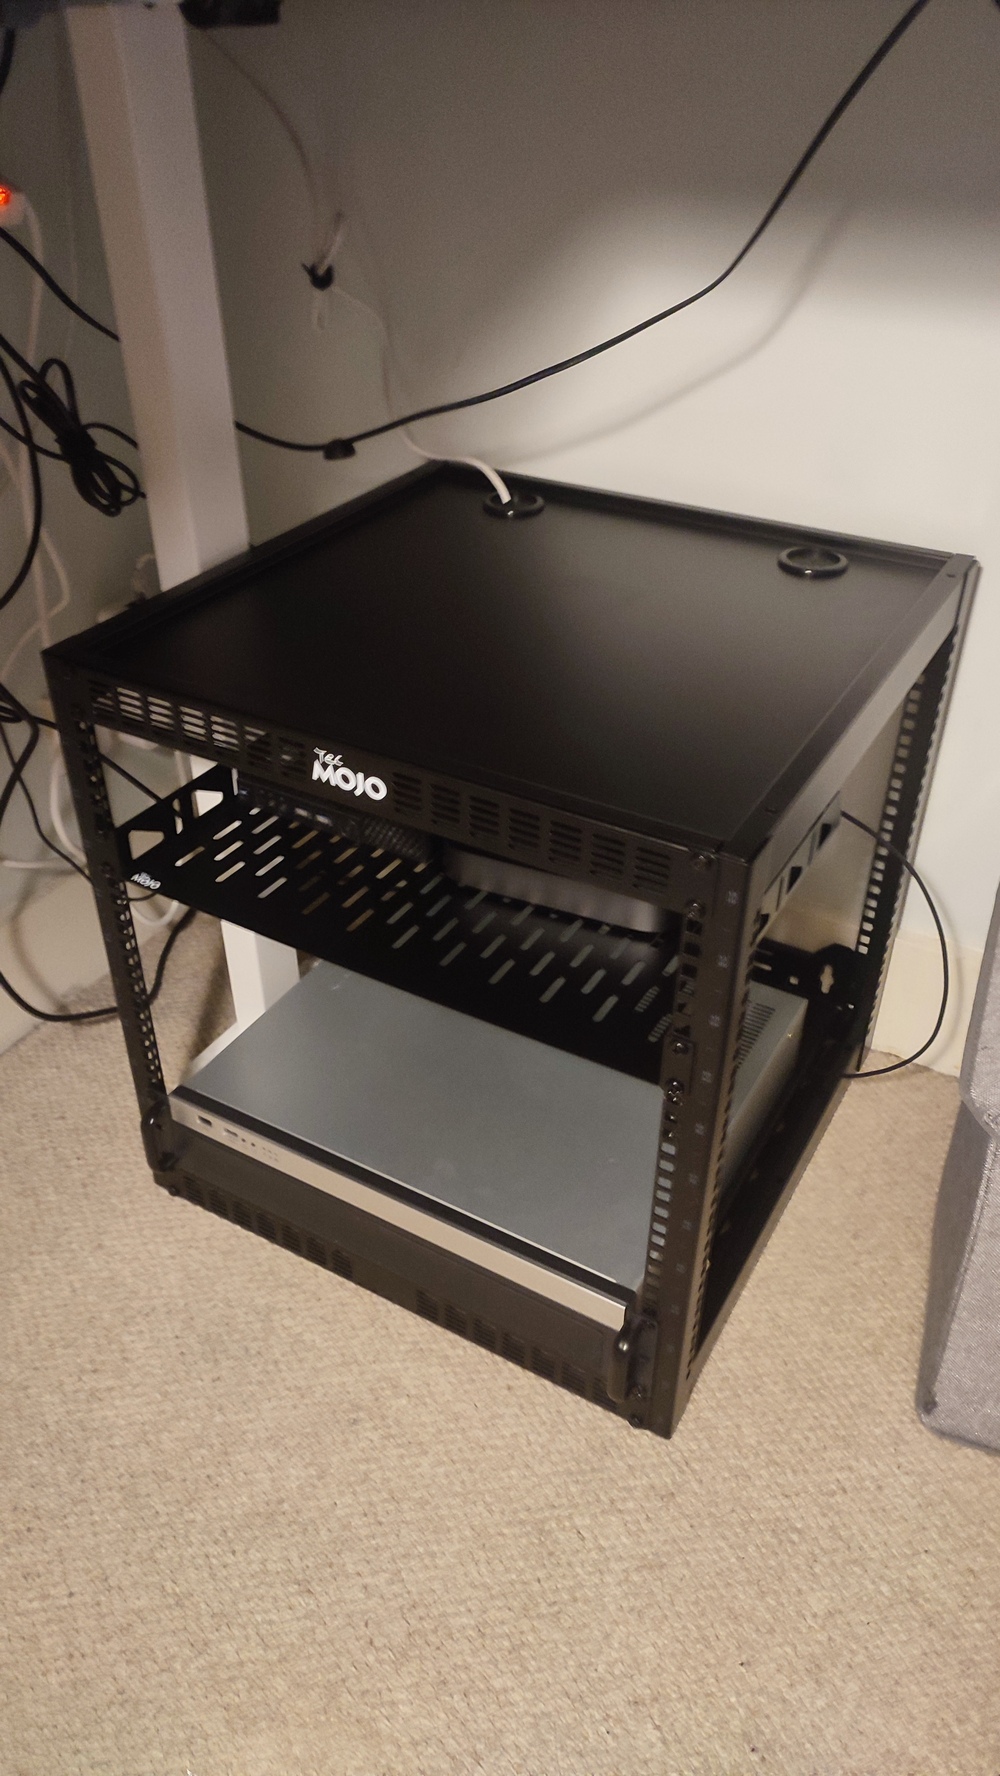
Rack
I only had space for a cube of around 60cm x 60cm x 60cm. Anything larger wouldn’t fit under my desk. This size constraint drove the choice of the rack. In height, this is about 12U (see here to understand what a U is). I ended up purchasing this 12U Open Frame Network Rack from Tecmojo. It comes with 2 shelves.

Here is what you really need to know about server racks:
- The mounting width is standardized to 19 inches (48.26 cm)
- The vertical space is standardized, measured in U (1U = 1.75 inches or 4.445 cm)
- The depth….can vary. It’s not really standardized, but most racks are between 60 cm and 90 cm deep (23 to 35 inches)
When choosing a rack, the depth is really important because it will determine what kind of equipment you can fit in it. For example, most enterprise servers are around 32 inches deep (~81 cm). Companies regularly update their equipment, and when it happens they often sell their old equipment at a very low price. You can find very good deals on second-hand enterprise servers on eBay IF your rack can accommodate them. Unfortunately, I didn’t have the space for a deeper rack. For the time being, my server options will be more limited. Custom cases exist, but they are overall more expensive and harder to mount (there are no standard rails for them for example).
Network switch
I chose the YuanLey 9 Port 2.5G PoE Switch Unmanaged. It’s cheap, provides enough ports, is rack-mountable, and uses a standard power cable (instead of a power brick).
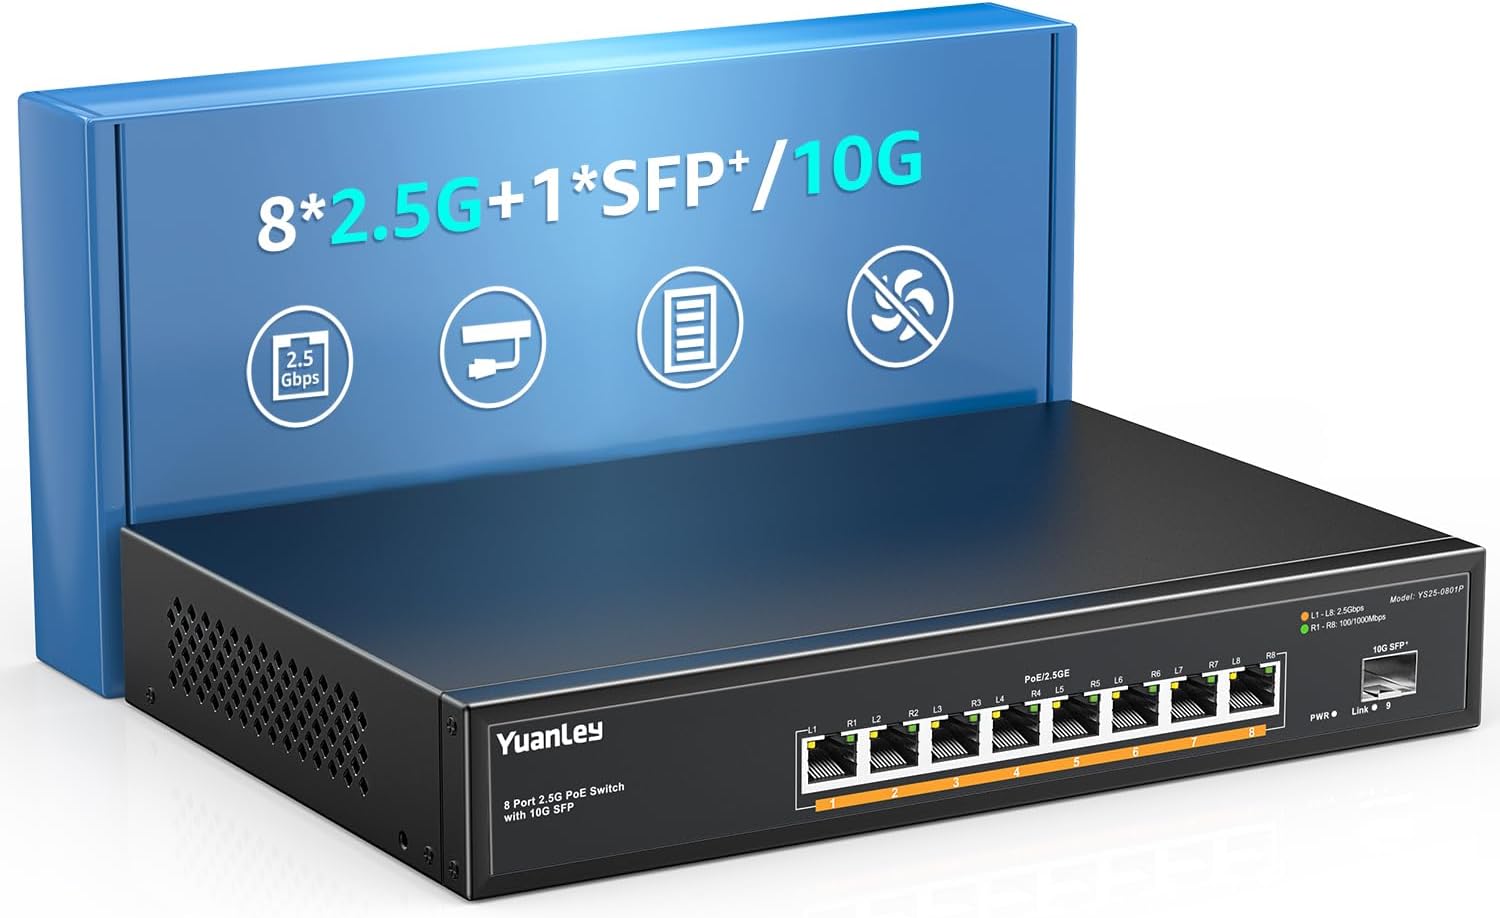
Switches come in two flavors: managed and unmanaged. Managed switches allow you to create VLANs, monitor traffic, and configure various settings. Unmanaged switches are simpler and cheaper, but they don’t offer any of these features. One cable comes in from your router and provides internet access, other cables come out to your devices.
I just needed something simple and cheap. When choosing a switch, what matters is the speed of the ports. My internet connection is 2.5 Gbps, so my switch needed to support at least that. I wouldn’t recommend going for 1 Gbps these days, 2.5 Gbps is really the minimum you should aim for if you intend to keep the switch for a while. If your budget allows it, go for 10 Gbps.
Network patch panel
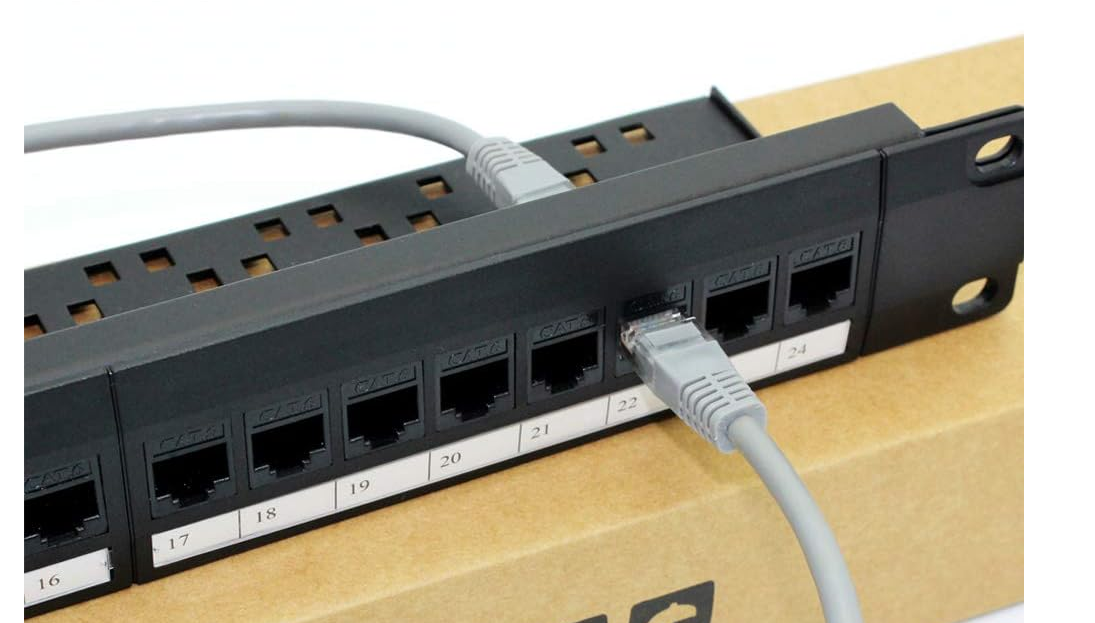
A patch panel helps keep your Ethernet cables tidy and makes connecting devices much simpler. When you mount a switch on a rack, its ports face the front, but your devices usually connect from the back. With a patch panel, you can route cables from the switch through the panel, making it easy to connect everything neatly at the rear of the rack.
I chose this one. Nothing particular about it, it’s cheap and does the job.
Power strip
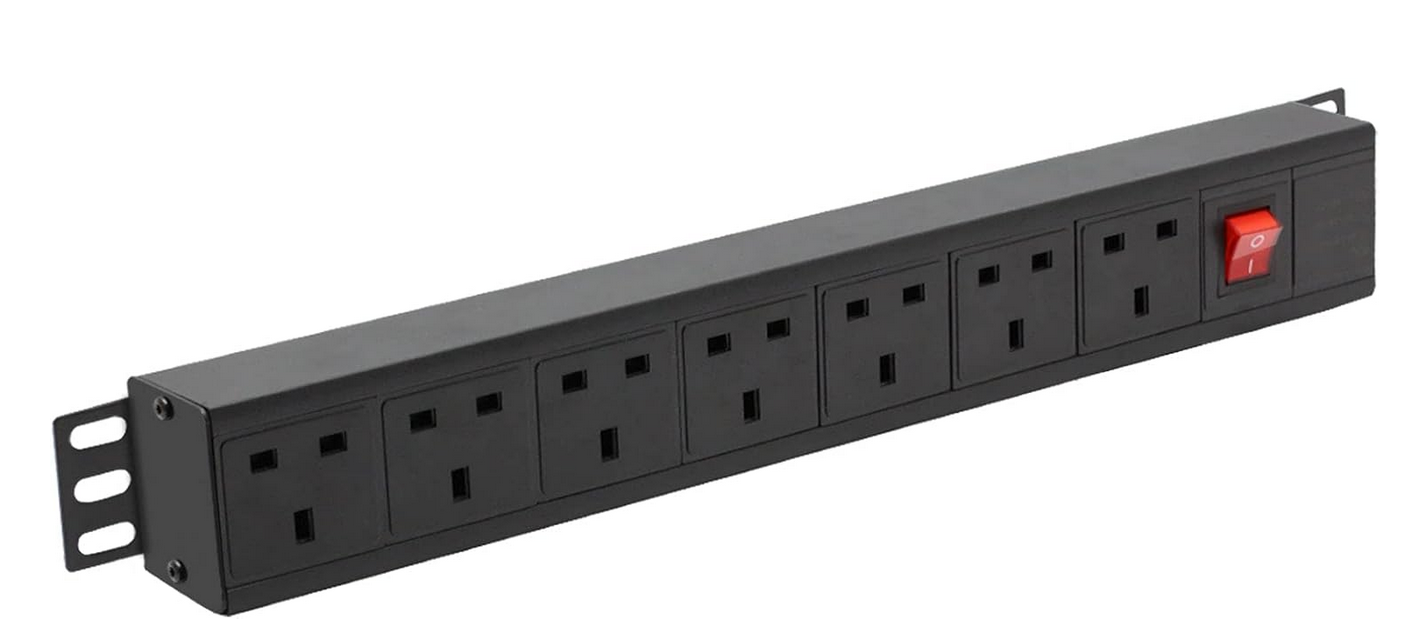
This is once again a very practical component. I mounted this strip at the back of the rack, on the highest U. I can plug the power cables of all my devices into it, and then plug the strip into the wall. This helps reduce the number of cables going to the wall (I only have two: the power cable of the power strip, and the network cable going to the router).
I chose this one.
New case for the NAS
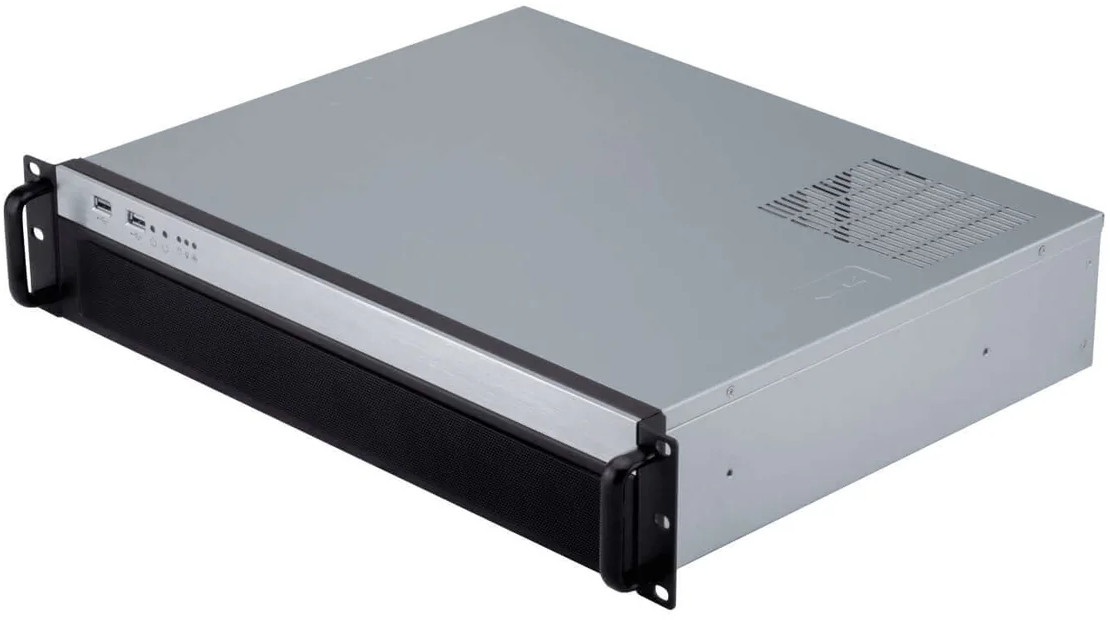
Since I’m moving everything to the rack I needed a new case for my NAS. The old Fractal case was decommissioned. There are four 3.5” hard drives in the NAS and its mother board is a Micro-ATX. The rack is also a bit short, so I knew only a 2U case would fit all the components. Luckily, 2U cases tend to be quieter than 1U cases (the fans are bigger, so they can run slower and still cool the components). I chose a XPC-2400 2u 400mm Micro ATX Rackmount Chassis
Dell PowerEdge R230 1U Rack Server
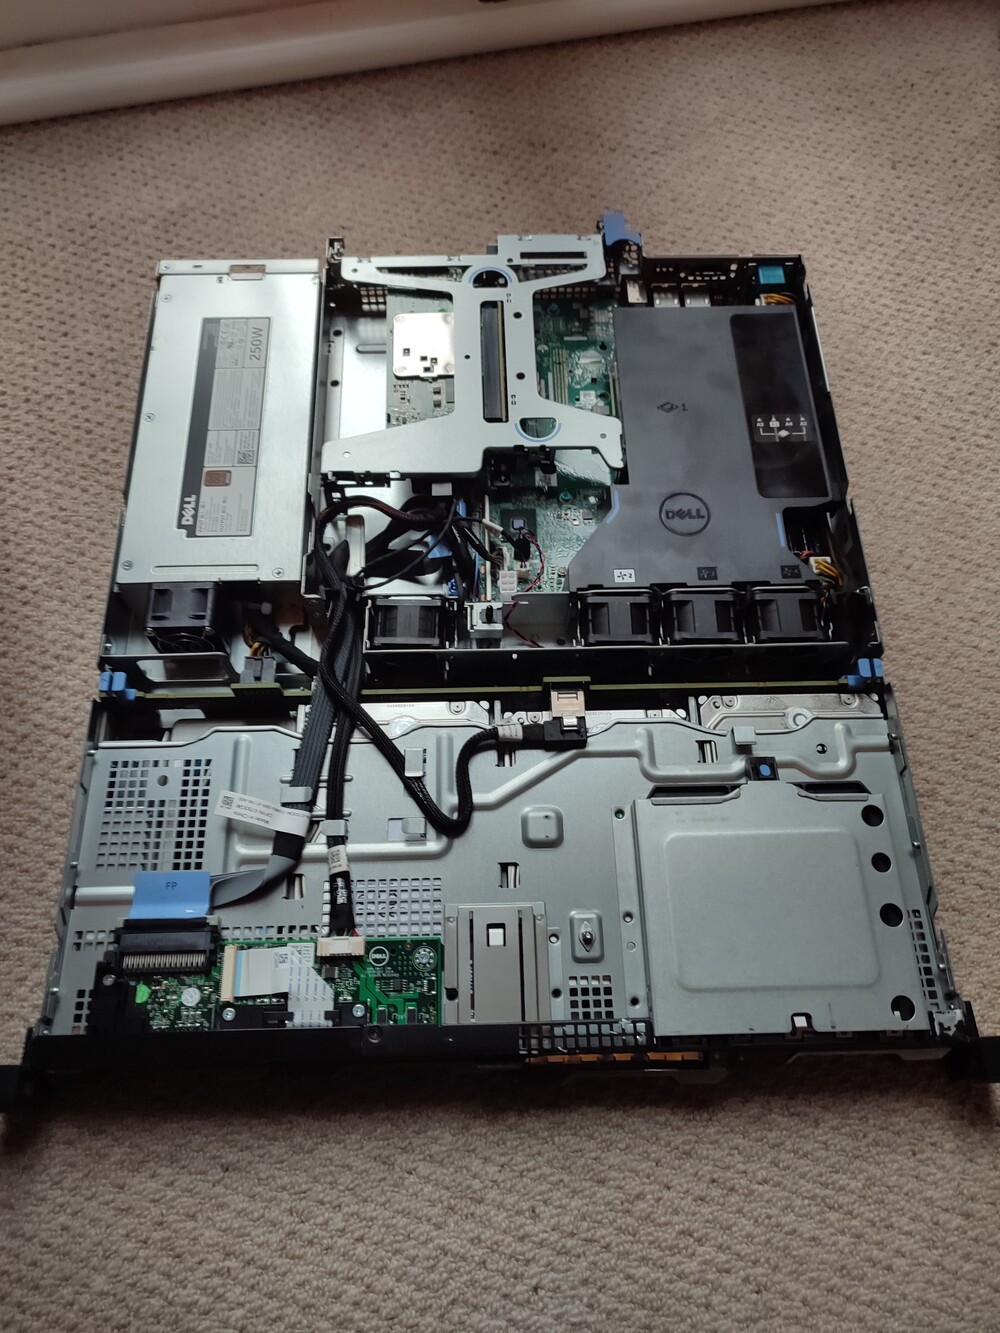
Well, I couldn’t resist getting yet another server…. The R230 is an old model (from 2015), and one of the shortest in the PowerEdge lineup. It does protrude a bit from the back on the rack (only a few centimeters), but I managed to get a second-hand one with excellent specs from Bargain Hardware, at a very good price:
- Intel Xeon E3-1230 V5 - 4-Core 8-Threads 3.40GHz
- 2 x 16GB - DDR4 2133MHz
- Dell RAID Controller H730
- 3 x 4TB SAS hard drives (I didn’t know about SAS drives before)
- 1 x 275GB SATA SSD
The total cost was around £300. I didn’t know about SAS drives before looking for a server rack. They’re supposed to be more expensive and more reliable than SATA drives, and they require a special controller to work. They’re mostly used in enterprise settings. But surprisingly, some second-hand SAS drives can be found at very low prices (again, probably because some companies just want to get rid of them).
Assembly
When assembling a rack, common sense dictates that the heaviest components should be placed at the bottom, and the lightest at the top (you don’t want the heaviest components to fall and crush your toes/other components).
Migrating the NAS
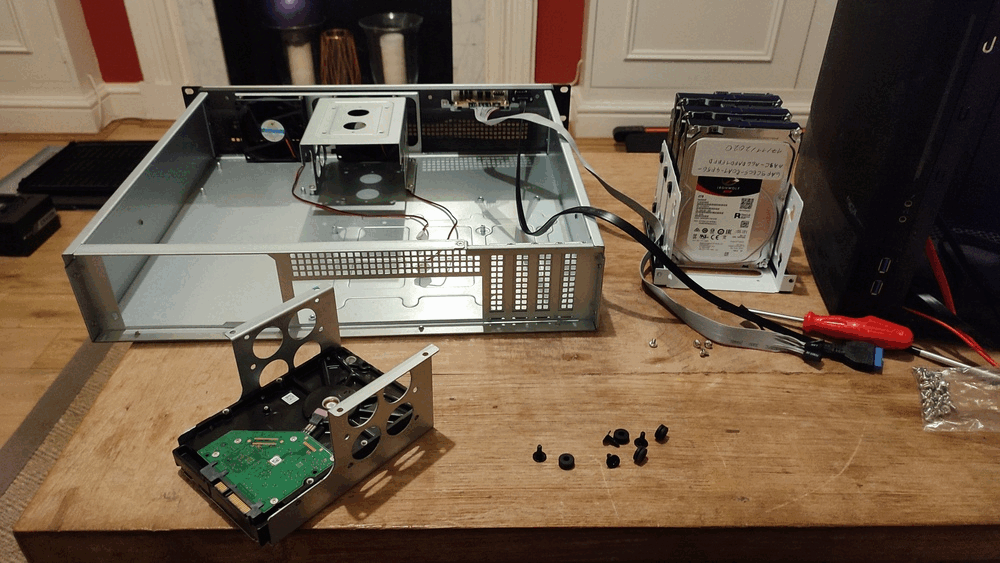
This was a bit tedious, but not too difficult. I pulled out the power source, the motherboard and the disks from the old Fractal case, and mounted them into the new XPC-2400 case. I simply “lifted and shifted” the components. I only had to do a bit of re-wiring to connect the board to the fans of the new case.
I then mounted the new case into the rack, at the very bottom (I didn’t have the R230 at that point). This case is “ear-mountable”, which means it has two very sturdy plates of metal called “ears” on the sides that can be screwed directly into the rack.
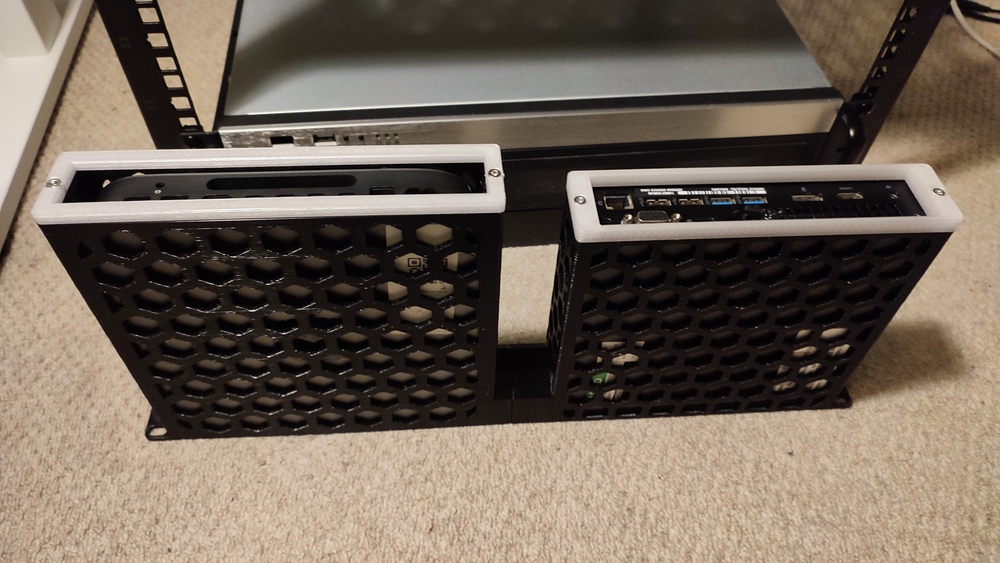
Mounting the Mac mini and the Dell Optiplex
These two machines are not meant to be mounted on a rack, but it’s possible to 3D print mounts for them. Luckily, the community had already done the work for me:
- Dell Optiplex mount (made for a different model, but it fits the 3050 Micro)
- Mac mini mount
I printed the mounts on my Prusa MK3S+, with a filament made of PC/PETG. It’s a complicated material to print, but it is very strong and heat resistant.
After some gluing and screwing, I ended up with a 1U mount for the machines.
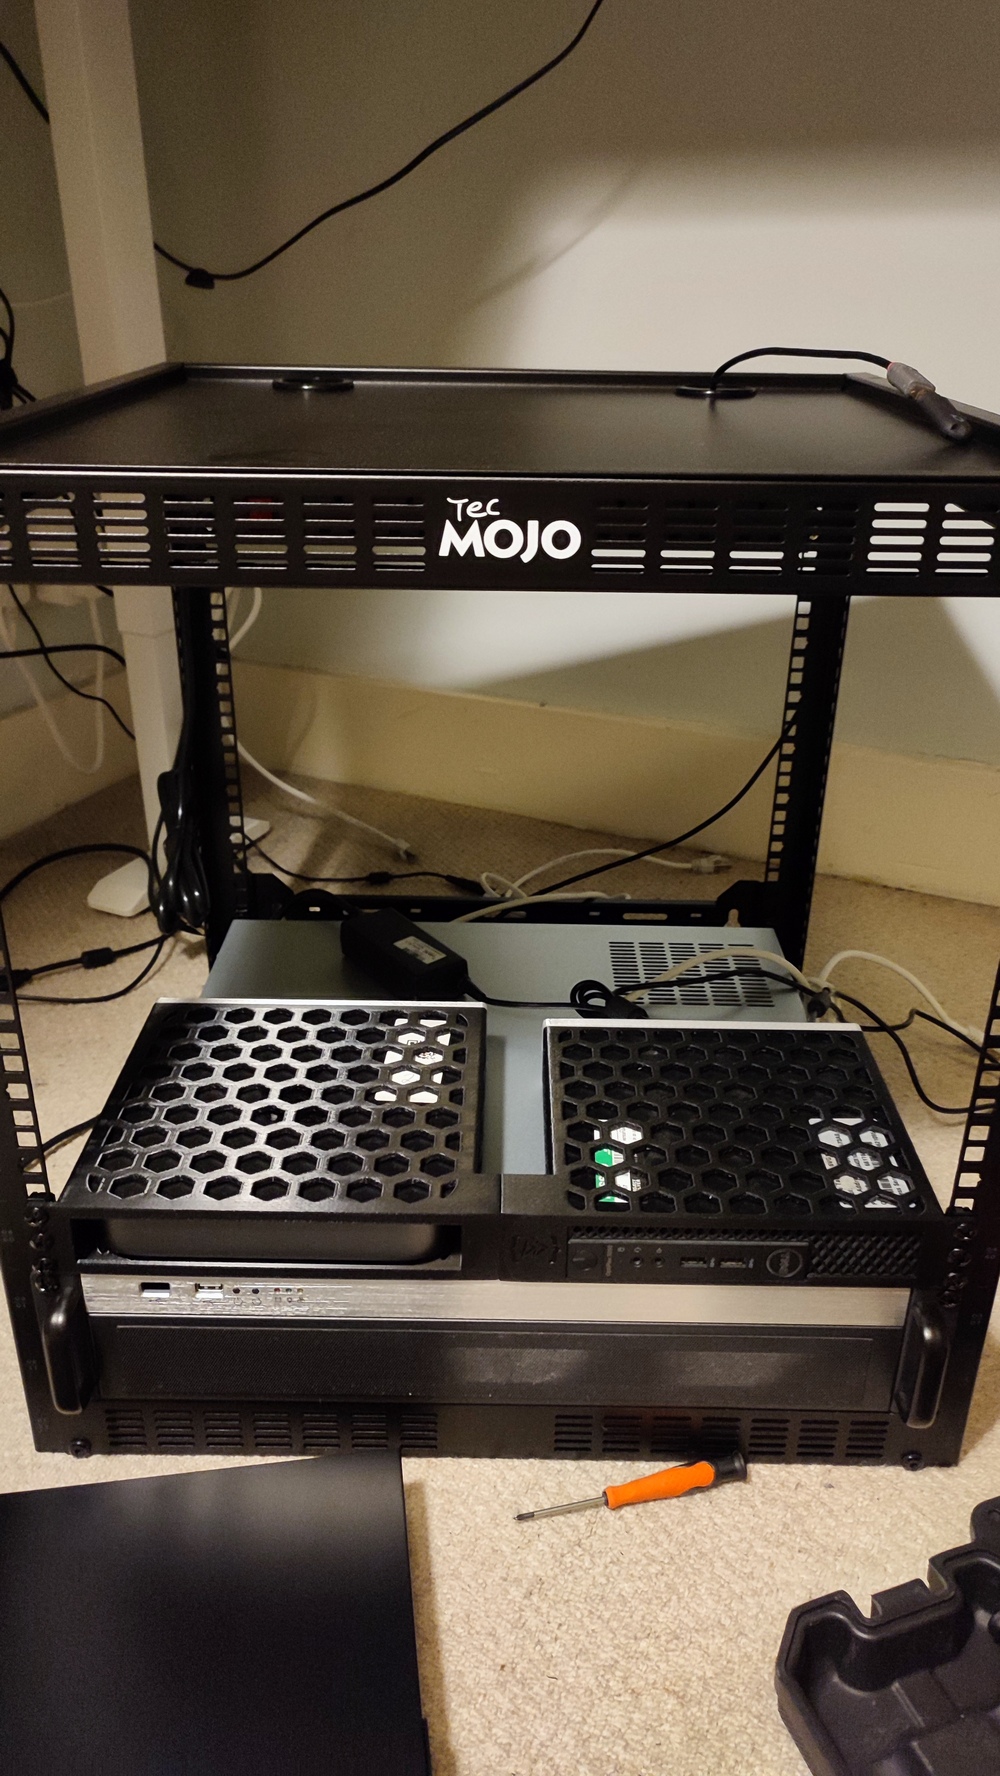
Mounting the Dell PowerEdge R230 1U Rack Server
Mounting it was tricky because normally, this kind of server is mounted on rails. I couldn’t install any rails because of the depth constraint of my rack, the rails were too long and I couldn’t fit them. Instead, I used a rack shelf mounted from the back of the rack, at the bottom. The back end of the poweredge is supported by the shelf, and the front end is supported by the ears of the server (I found a couple of ears from a rail kit on eBay).
Using the Dell PowerEdge R230 server
Second-hand servers generally come blank, with no operating system. The first thing I tried to do was install Arch Linux on it, but I ran into a problem I had not thought about: the server only has a VGA port, and I have a HDMI monitor. This is when I discovered iDRAC. It’s a hardware management feature built into most Dell PowerEdge servers that allows to remotely manage servers, even when the server is powered off or unresponsive. I needed to first connect the server to my network (through Ethernet), and then I could access iDRAC through a web interface. I first tried to go through the browser, but to access the virtual console I had to install some clunky Java applets. I quickly gave up on that and found a Python script that downloads and launches a KVM console (see guide here). Once I had access to the console, I could install Arch Linux from a USB stick. Once Arch was installed, I could access the server through SSH, no need for iDRAC anymore.
NOTE: once fully set up, this server is suuuuuuuper noisy under load, or when it’s too hot outside. Because the fans are small, they need to run at high speed to cool the components and it sounds like a jet engine. However, when idle, the server is quiet enough.
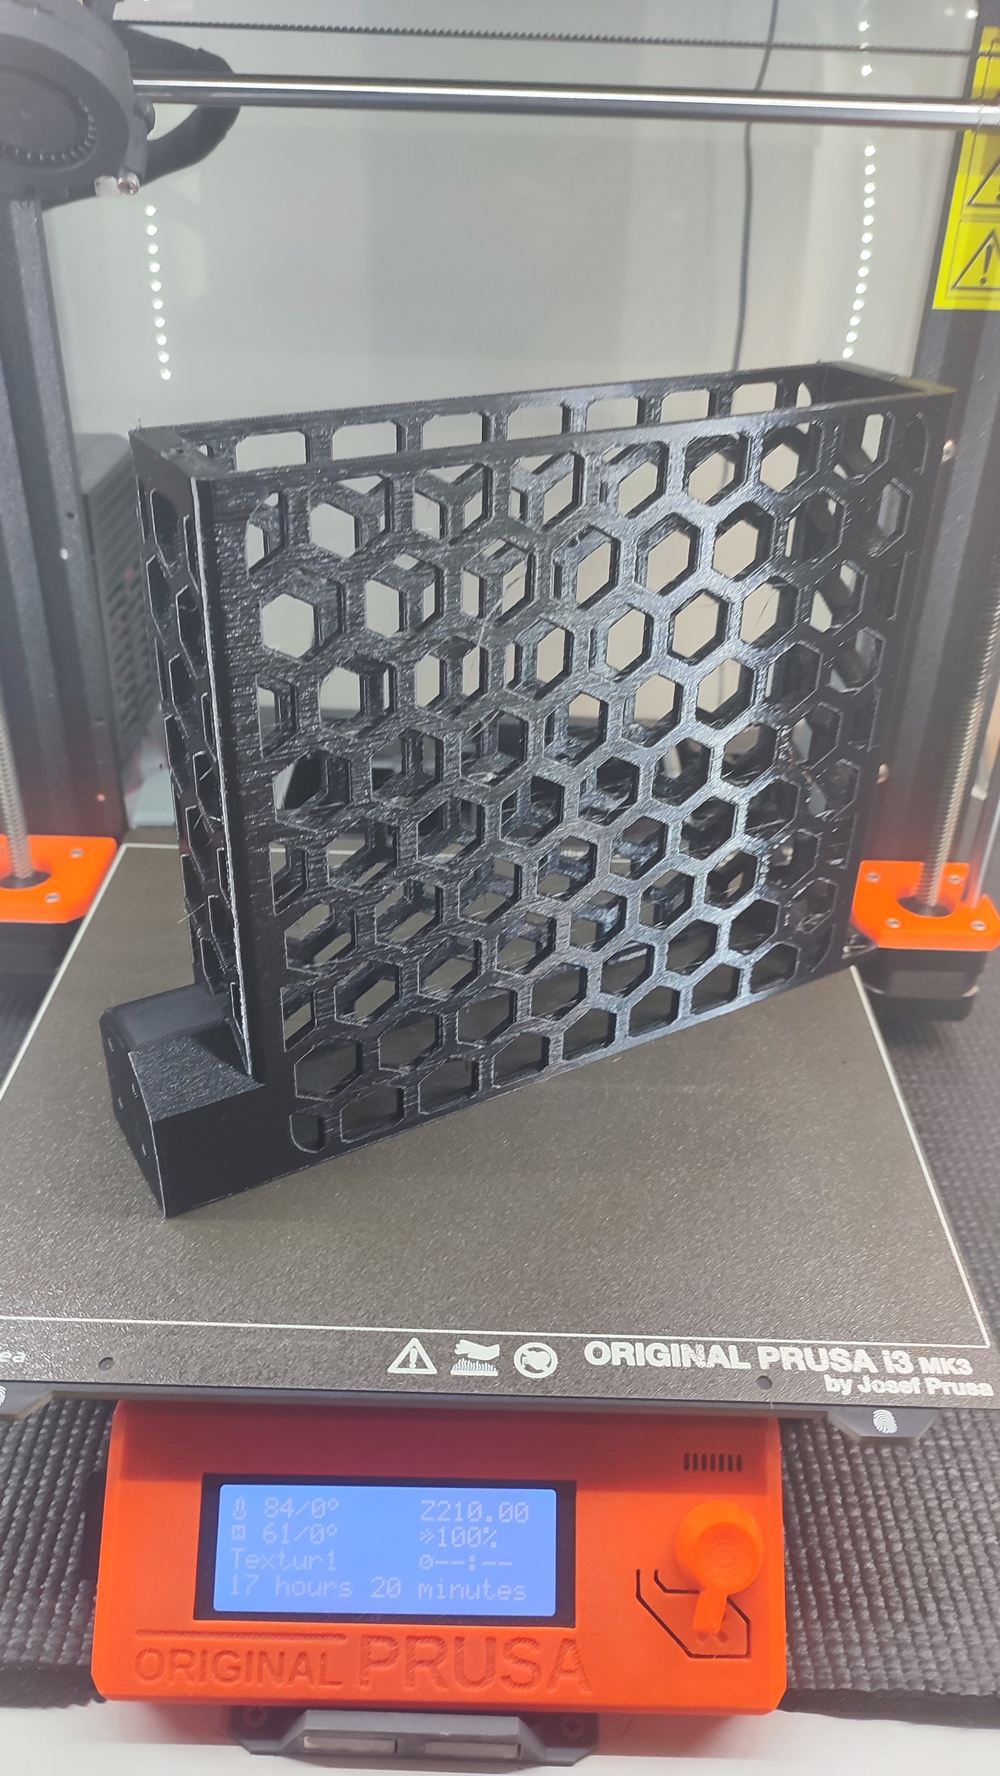
Update 08-2025
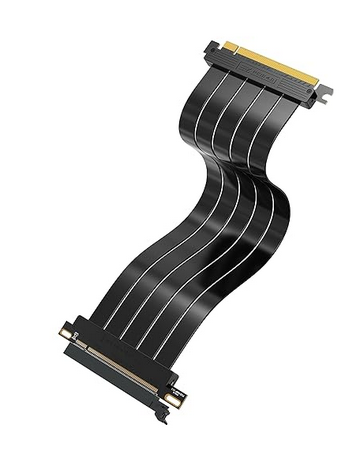
I added a RTX 3060 GPU to the server rack. I plugged it into the case of the NAS. This was a bit tricky because the case is only 2U, and the GPU didn’t fit in the case. I had to use a riser cable (30 cm), ~£40:
And then I used a 3D printed hexagonal mount to attach the GPU to the rack:
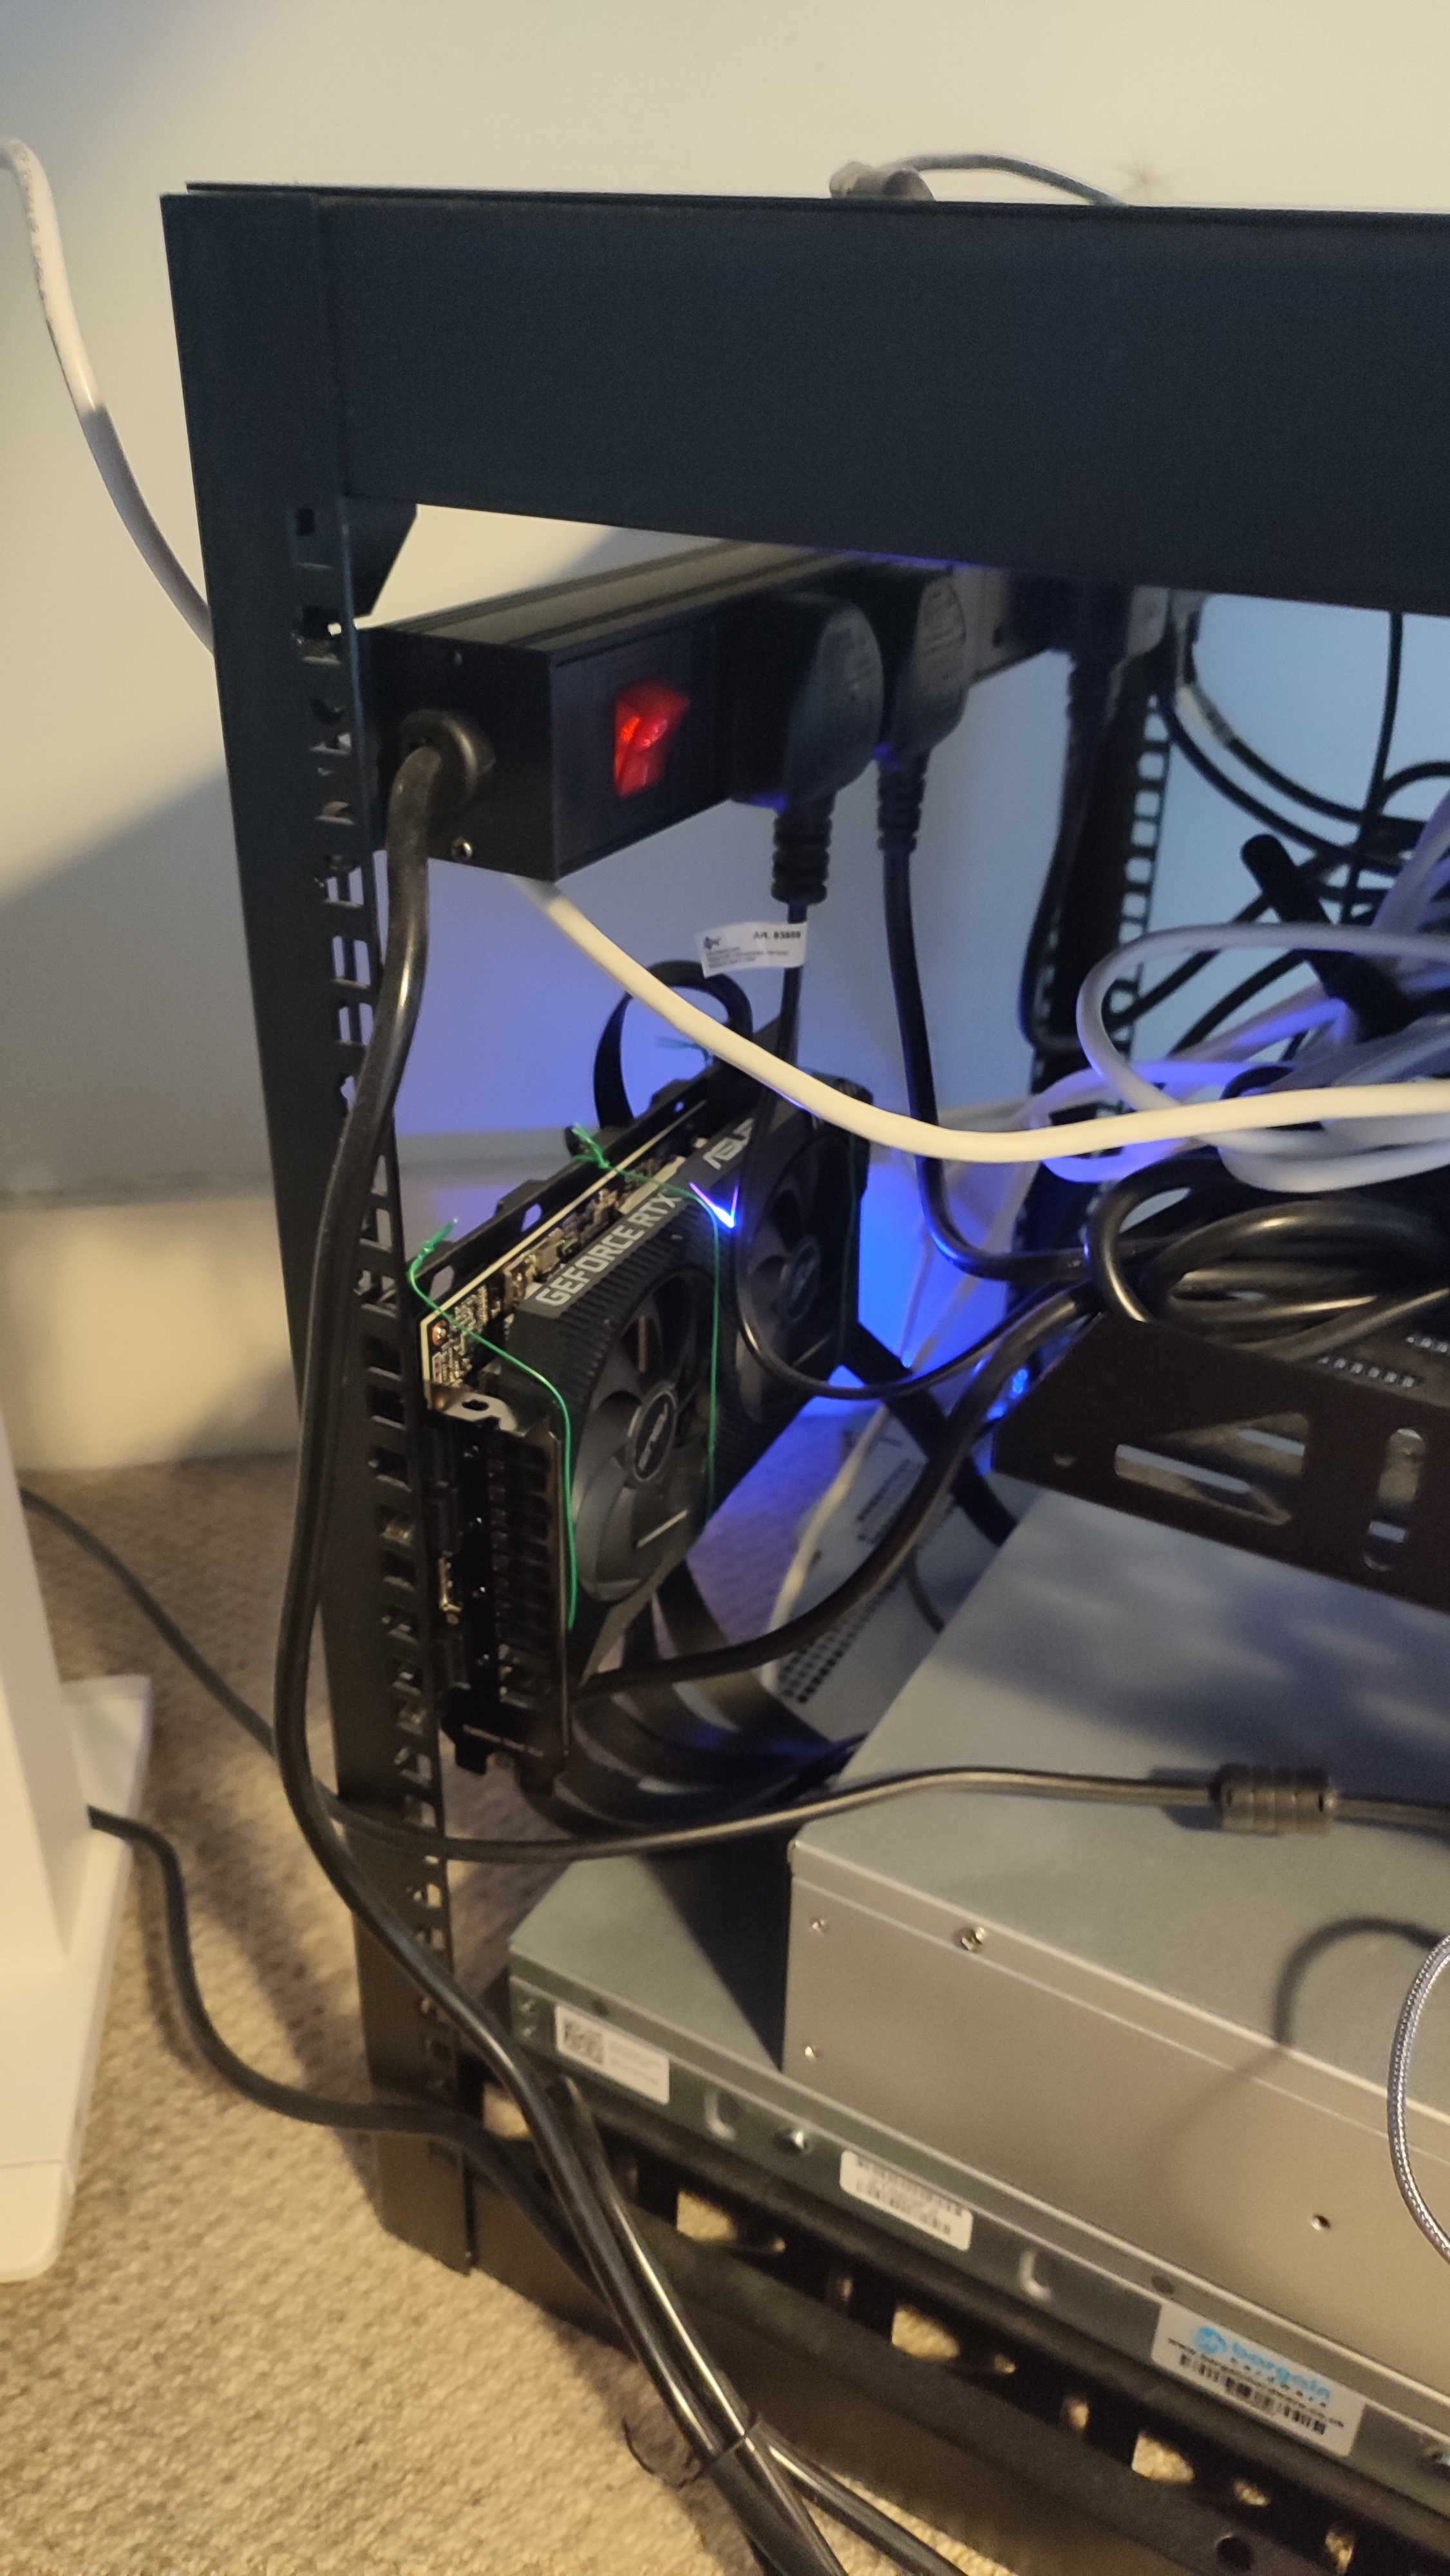
I’m not particularly proud of it, but if it works, it works…
Conclusion
This was a fun project, I learned tons of stuff about server racks and how they’re set up in data centers. I even learned a bit about SAS drives and iDRAC. If I had to do it again (and I will someday, when I have more space…), I would probably go for a deeper and taller rack, so I could fit most second-hand enterprise servers. If noise is a concern, I would try getting 2U servers instead of 1U servers, since the 1U servers are really noisy.