Homemade NAS with RAID 5
I had never built a computer/server before. I was always keen on trying to do so, but I never found the time. I finally found the time, thanks to COVID-19 and multiple lock downs…
EDIT 2 YEARS LATER: I have been running the setup described below for two years now and I am extremely satisfied with its stability. The RAID has been behaving exactly as expected and I never had to do any maintenance on it (apart from monitoring the healh of the disks with SMART). The server just requires the occasional Arch update, but that’s about it.
Requirements
My primary goal was to build a NAS to reliably store media (movies, series, photos) and backups (including large files like virtual machines). Until now, I was storing my multiple TBs of data on several disks. It was hard to track which content was on which disk, and of course I suffered from several drives failures over the years, each time losing a somewhat important amount of data. It was time to move my data to a NAS.
I was also interested in having this NAS accessible from several devices, in particular from my smart TV: it’s a small Raspberry Pi 3 running OSMC. Having the NAS accessible over the network (with Samba for example) would allow me to stream movies/series directly from my home server, and I could get rid of cumbersome hard drives (and wires) around my TV.
I didn’t want to go for a commercial NAS, like the ones Synology offers (where is the fun in that?). Also, the cheapest models only support two disks, and the more advanced ones are crazy expensive. No, I wanted something (just as expensive) that I could build myself, and potentially modify later on.
I decided to buy the parts separately and assemble the whole thing myself. Regarding the RAID level, I thought RAID 5 would be a good compromise between price, fault tolerance, and space efficiency. It’s actually a common choice for home servers. For those who don’t know, a RAID is an array of disks that can be made fault tolerant with for example, a distributed parity disk (like in RAID 5). This means that if a drive fails, thanks to the parity mechanism, no data is lost (providing you replace it at some point).
The parts
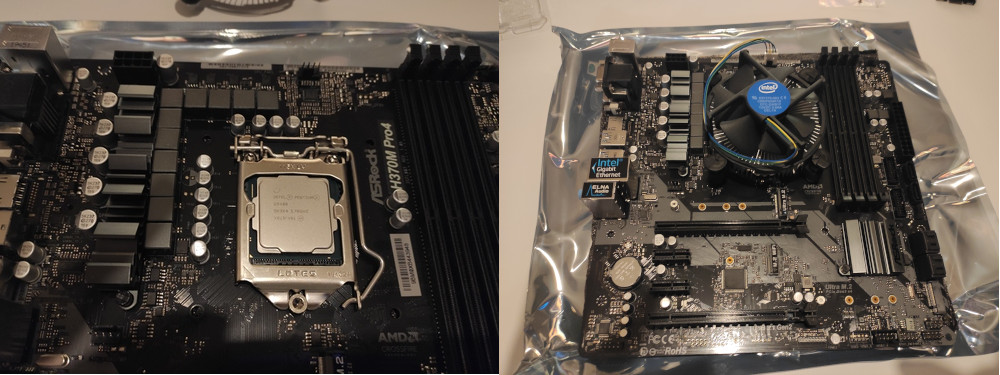
- Mother board: Asrok H370M Pro4 (~104€)
- CPU: Intel Pentium G5400 (~82€)
- SSD: Kingston A2000 SSD NVMe PCIe M.2 2280 500GB (~69€)
- RAM: Corsair Vengeance LPX 8Go (1x8Go) DDR4 2666MHz C16 XMP 2.0 (~40€)
- Power supply: Corsair CV Series CV450Watt, 80 Plus Bronze (~45€)
- Case: BT FRACTAL Design Node 804 black 2019 (~89€)
- Hard drives: Seagate IronWolf 4 TB (117-130€)
A few things to note regarding the hardware: the CPU was out of stock when I decided to buy it, it’s normally 20€ cheaper. It comes with a fan, so no need to buy one separately. I bought 2 x 8GB sticks of RAM. I already had one hard drive (almost full), so I bought three additional ones. RAID 5 only needs 3 disks to work, but since the disk I had was full, I thought I would first build the RAID array with the 3 new disks, copy the data from the 4th disk on the array, wipe the 4th disk, and finally add it to the array. The mother board supports 6 SATA drives (nice for a board at this price). The case is huuuuge, but it supports eight 3.5” disks, and has room for 5 GPUs. I don’t know if I will ever use all of the connectivity of the case, but at least there is room for expansion…
Total: ~1000€. About half of that amount is due to the hard drives. This might seem like a lot, but a Synology NAS with 4x4TB drives and 16GB of RAM will be more expensive.

Assembly
I was told by one of my colleagues at work that the only tricky part of the assembly was to put the CPU and the fan on the board. And he was right. It took me several attempts to get the fan perfectly level on the CPU. But ultimately it wasn’t too difficult. The fan comes with thermal paste already applied, so it only took me a couple of Youtube videos to get it right.
The rest was actually pretty straight forward. I added the RAM sticks into their slots, and screwed the mother board inside the enclosure, without forgetting the spacers that prevent the board from touching the metal of the enclosure.
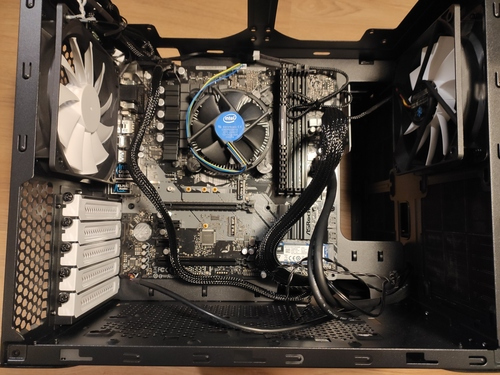
I then assembled the power supply and the drives:

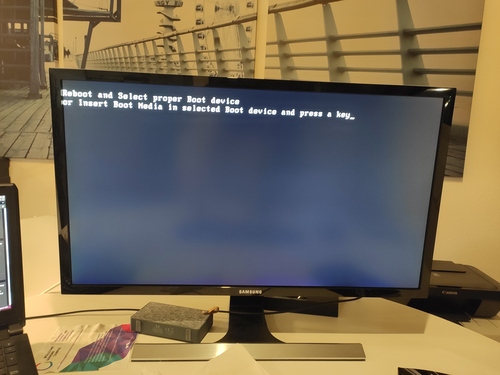
And then I connected the whole assembly to my screen over HDMI, and turned the power ON. And…..nothing. After some rapid verification, it turned out the RAM sticks were not entirely plugged in. Ouf. I fixed it, and finally (finally):
Installing a distribution
For the Linux distribution that I would run on this server, I chose Archlinux. It might seem like a weird choice for a server, but Arch never failed me and that’s what I run everyday on my laptop. Let’s keep things simple.
I installed Arch with a bootable USB key. Apart from having to move the huge case close to the router to connect it through Ethernet, this wasn’t a difficult part for me. Once Archlinux was installed, I set up a SSH server, put my public key on it, and moved the case into its final location.
Setting up the RAID
Regarding the RAID setup, I chose a software RAID with mdadm (that’s
apparently what Synology runs on its NAS).
I first partitioned the three first disks of the array with a GPT partition, following traditional guidelines (like leaving some extra space at the end of each disk to account for small size differences between the disks). After partitioning:
Disk /dev/sda: 3.64 TiB, 4000787030016 bytes, 7814037168 sectors
Disk model: ST4000VN008-2DR1
Units: sectors of 1 * 512 = 512 bytes
Sector size (logical/physical): 512 bytes / 4096 bytes
I/O size (minimum/optimal): 4096 bytes / 4096 bytes
Disklabel type: gpt
Disk identifier: E236B959-6E3C-4A84-9189-61BB4E67D6F5

Device     Start        End    Sectors  Size Type
/dev/sda1   4096 7813832334 7813828239  3.6T Linux RAID


Disk /dev/sdb: 3.64 TiB, 4000787030016 bytes, 7814037168 sectors
Disk model: ST4000VN008-2DR1
Units: sectors of 1 * 512 = 512 bytes
Sector size (logical/physical): 512 bytes / 4096 bytes
I/O size (minimum/optimal): 4096 bytes / 4096 bytes
Disklabel type: gpt
Disk identifier: EE6DFF72-788B-45DC-BD41-A50E5F82C7AF

Device     Start        End    Sectors  Size Type
/dev/sdb1   4096 7813832334 7813828239  3.6T Linux RAID


Disk /dev/sdc: 3.64 TiB, 4000787030016 bytes, 7814037168 sectors
Disk model: ST4000VN008-2DR1
Units: sectors of 1 * 512 = 512 bytes
Sector size (logical/physical): 512 bytes / 4096 bytes
I/O size (minimum/optimal): 4096 bytes / 4096 bytes
Disklabel type: gpt
Disk identifier: 6FA2F094-615E-49E2-9E8A-E8057F91E799

Device     Start        End    Sectors  Size Type
/dev/sdc1   4096 7813832334 7813828239  3.6T Linux RAID
Creating the array was then as simple as:
❯ sudo mdadm --create --verbose --level=5 --metadata=1.2 --raid-devices=3 /dev/md/MyRAID5Array /dev/sda1 /dev/sdb1 /dev/sdc1
[sudo] password for jpfrancoia:
mdadm: layout defaults to left-symmetric
mdadm: chunk size defaults to 512K
mdadm: size set to 3906781696K
mdadm: automatically enabling write-intent bitmap on large array
mdadm: array /dev/md/MyRAID5Array started.
Creating the array took a few hours, but it was already working in degraded mode after the above command. I created a couple of ext4 partitions (no zfs or more exotic file systems, I wanted to keep things as simple as possible).
I then copied the data of the (full) 4th drive onto the array. I waited until the array was fully built, then added the 4th drive to the array, following the exact same procedure as before. I then resized my ext4 partitions, and the RAID was finally working full speed!
Additional settings
There was little left to do. I enabled mdmonitor.service, which
will monitor the health of the RAID and send me an email if something
goes wrong. I get a test email every Saturday to make sure the mail service is
still working. I configured and started a Samba server with a public drive
that serves all my movies/series. I setup UFW (Uncomplicated Firewall) to
only allow Samba and SSH on the local network. Everything has been running
smoothly for over a month, and I can stream videos directly from my smart TV.
Mission accomplished.
Even though there are thousands of other posts like this one on the Internet, I had lots of fun building my NAS, and it’s actually usable!